
hugo 美化 2

自定义字体
参见 Hugo 自定义字体
建站时间加多语言设置
将建站时间和博客总字数添加到页脚,并适配多语言自动切换:
效果如下
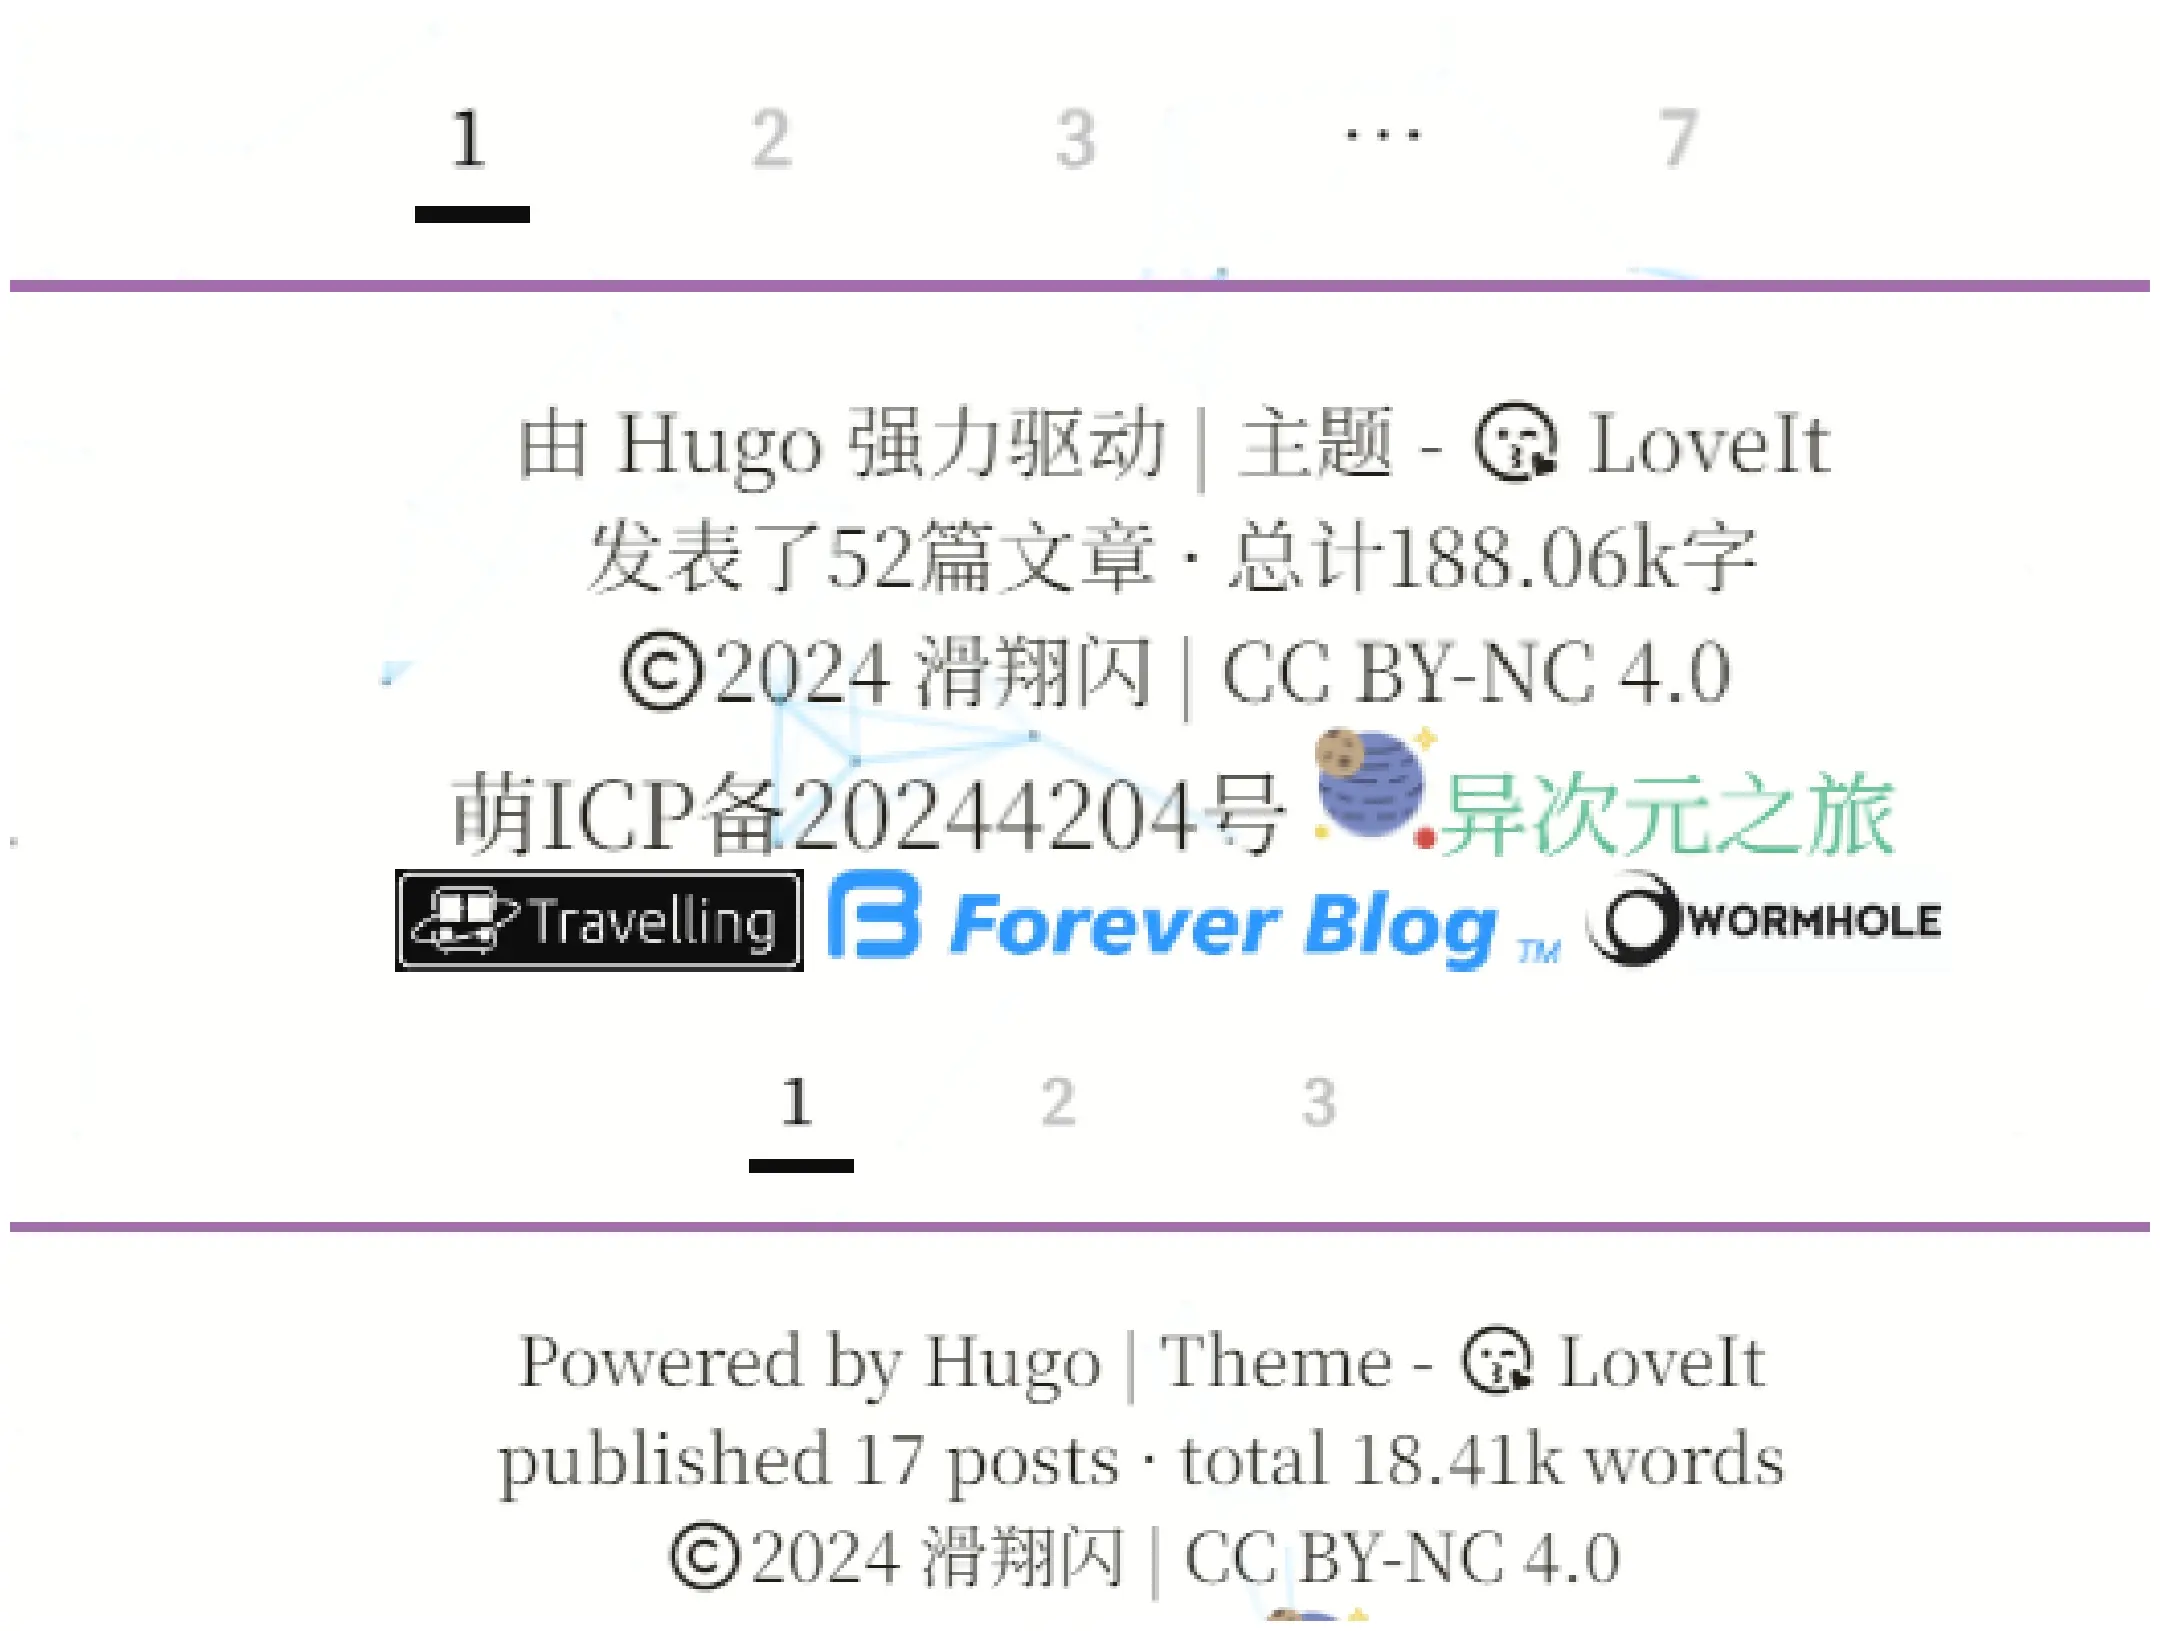
一般多语言 hugo 博客都有一个 i18n 文件,目的就是识别页面语言参数,然后替换相应文字。
总字数
添加博客总字数统计
找到 <你的博客文件>\layouts\partials\footer.html,
在里面添加以下代码:
{{ $articleCount := len .Site.RegularPages }}
{{ $totalWordCount := 0 }}
{{ range .Site.Pages }}
{{ $totalWordCount = add $totalWordCount .WordCount }}
{{ end }}

{{ i18n "articleCount" (dict "Count" $articleCount) }},{{ i18n "totalWordCount" (dict "WordCount" $totalWordCount) }}。
然后找到 <你的博客文件>\i18n
在 zh-CN.toml 里添加
# === footer/wordcount ===

[articleCount]
other = "发布了 {{ .Count }} 篇文章"

[totalWordCount]
other = "共 {{ .WordCount }} 字"
在 en.toml 里添加
# === footer/wordcount ===

[articleCount]
other = "published {{ .Count }} posts"

[totalWordCount]
other = "total {{ .WordCount }} words"
多语言切换显然是一对一的字符识别。
因此,在
i18n文件中,每个[调用名称]下只能有一个other=,同时[调用名称]不能重复,这样才能一对一自动切换字符。
一个 bug
如果你像我一样,通过 aplayer 在每个博客文章页面都添加了一个音乐播放器,那么会出现一个 bug。
Hugo 自带的字数统计会和 aplayer 发生冲突。纯音乐的播放器会消失,带歌词的播放器可能会继续保留,原因不明。本地渲染时,更新博客内容触发刷新后,音乐播放器就会出现,但上传到 github 渲染后却不行。
最近借助 claude code 加 deepseek v3.2 模型测试了下这个 bug。
发现音乐插件的失效原因大概是:
LoveIt 主题使用 Hugo 的 Scratch 系统作为“功能开关”机制:
music短代码执行时设置:{{- .Page.Scratch.SetInMap "this" "music" true -}}assets.html中检查:{{- if (.Scratch.Get "this").music -}}来加载音乐资源。
wordcount.html 引入了一个变化:
{{- $posts := where .Site.RegularPages "Type" "posts" -}}
{{- range $posts -}}
  {{- $totalWords = add $totalWords .WordCount -}}
  {{- $totalPosts = add $totalPosts 1 -}}
{{- end -}}当Hugo执行.Site.RegularPages时:
Hugo 为了获取 WordCount 需要计算每篇文章的内容,这会重置页面的 Scratch 状态。然而在这个过程中,原本在单次渲染流程中保持的 Scratch 状态被干扰。
个人观察是否安装了评论区插件也会影响这个 bug,原因似乎也是同样的——Scratch 状态值似乎被清空了。
在评论区加载部分layouts/partials/comment.html存在这样的代码:
{{- dict "comment" $commentConfig | dict "config" | merge (.Scratch.Get "this") | .Scratch.Set "this" -}}本地渲染可以通过更新网站重新加载 scratch 中的 this 映射,但上传到 github 后容易被映射为空。
修改流程:
之前的流程:音乐短代码 → Scratch设置 → 主题条件判断 → 加载资源
修改后的流程:直接检测DOM → 动态加载资源 → 自主初始化
回过头来看,这个 bug 和中文博客目录跳转失败的原因相当类似。
站点运行时间
添加自定义的 custom.js
在站点根目录下创建一个自定义的 JavaScript 文件 \static\js\custom.js。
写入如下代码:
/* 站点运行时间 */
// 获取当前语言设置
function getCurrentLanguage() {
    // 假设你有一个全局变量或方法来获取当前语言
    return document.documentElement.lang || 'zh'; // 默认返回中文
}

// 更新站点运行时间
function runtime() {
    window.setTimeout(runtime, 1000);
    let startTime = new Date('02/18/2024 15:00:00');
//这里写自己的建站时间
    let endTime = new Date();
    let usedTime = endTime - startTime;
    let days = Math.floor(usedTime / (24 * 3600 * 1000));
    let leavel = usedTime % (24 * 3600 * 1000);
    let hours = Math.floor(leavel / (3600 * 1000));
    let leavel2 = leavel % (3600 * 1000);
    let minutes = Math.floor(leavel2 / (60 * 1000));
    let leavel3 = leavel2 % (60 * 1000);
    let seconds = Math.floor(leavel3 / (1000));

    // 根据语言设置选择对应的文本
    let language = getCurrentLanguage();
    let runtimeText;

    if (language === 'zh') {
        runtimeText = '本站已运行<i class="far fa-clock fa-fw"></i> '
            + ((days < 10) ? '0' : '') + days + ' 天 '
            + ((hours < 10) ? '0' : '') + hours + ' 时 '
            + ((minutes < 10) ? '0' : '') + minutes + ' 分 '
            + ((seconds < 10) ? '0' : '') + seconds + ' 秒 ';
    } else if (language === 'en') {
        runtimeText = 'Running for <i class="far fa-clock fa-fw"></i> '
            + ((days < 10) ? '0' : '') + days + ' d '
            + ((hours < 10) ? '0' : '') + hours + ' h '
            + ((minutes < 10) ? '0' : '') + minutes + ' m '
            + ((seconds < 10) ? '0' : '') + seconds + ' s ';
    } else {
        // 默认文本(可以选择其他语言或保留中文/英文)
        runtimeText = '本站已运行<i class="far fa-clock fa-fw"></i> '
            + ((days < 10) ? '0' : '') + days + ' 天 '
            + ((hours < 10) ? '0' : '') + hours + ' 时 '
            + ((minutes < 10) ? '0' : '') + minutes + ' 分 '
            + ((seconds < 10) ? '0' : '') + seconds + ' 秒 ';
    }

    // 更新页面上的内容
    document.getElementById('run-time').innerHTML = runtimeText;
}

runtime();
感兴趣的也可以看看本站完整的 custom.js。
找到 <你的博客文件>\layouts\partials\assets.html,在最末尾的 {{- partial "plugin/analytics.html" . -}} 的上一行添加如下代码:
<script type="text/javascript" src="https://cdn.jsdelivr.net/npm/jquery@2.1.3/dist/jquery.min.js"></script>

{{- /* 自定义的js文件 */ -}}

<script type="text/javascript" src="/js/custom.js"></script>
这样博客就可以调用自定义的 js 文件了。其他 js 文件也可以写在这里面。
修改 i18n
找到 <你的博客文件>\i18n
在 zh-CN.toml 里添加
[runtime]
other = "本站已运行{{ .Days }}天 {{ .Hours }}小时 {{ .Minutes }}分钟 {{ .Seconds }}秒"
在 en.toml 里添加
[runtime]
other = "The site has been running for {{ .Days }} days {{ .Hours }} hours {{ .Minutes }} minutes {{ .Seconds }} seconds"
背景
博客背景
我们可以通过直接在 footer.html 添加 js 文件的方式设置博客背景。
本文使用的蜂窝条形网络。还有其他 js,例如网格、球形、波浪、带状……
效果图可以参考:推荐几种简洁美观的博客背景效果
彩带:

<script id="ribbon" size="150" alpha='0.9' zIndex="-2" src="https://cdn.jsdelivr.net/gh/theme-next/theme-next-canvas-ribbon@1/canvas-ribbon.js"></script>

波浪:

<script src="https://cdnjs.cloudflare.com/ajax/libs/three.js/87/three.js"></script>
<script src="https://cdn.jsdelivr.net/gh/theme-next/theme-next-three@latest/three-waves.min.js" ></script>

蜂窝巢:

<script src="https://cdn.bootcss.com/canvas-nest.js/1.0.0/canvas-nest.min.js"></script>

随机点:

<script src="https://cdnjs.cloudflare.com/ajax/libs/three.js/87/three.js"></script>
<script src="https://cdn.jsdelivr.net/gh/theme-next/theme-next-three@latest/canvas_lines.min.js" ></script>

光球:

<script src="https://cdnjs.cloudflare.com/ajax/libs/three.js/87/three.js"></script>
<script src="https://cdn.jsdelivr.net/gh/theme-next/theme-next-three@latest/canvas_sphere.min.js" ></script>
注意事项
引入 js 背景需要限制范围
例如在页脚引入,如果不定义范围,那么页脚的链接会被覆盖,导致无法点击。

最好在页脚开头定义一个环境体用来分层
<!-- 页脚 -->
<footer class="footer">
    <div class="footer-container">
        <div class="footer-line">
最后将引入的 js 设置为最底层即可:data-zIndex="-1"
    <!-- 引入 canvas-nest.min.js -->
    <script src="https://cdn.bootcss.com/canvas-nest.js/1.0.0/canvas-nest.min.js"
        data-color="0,0,0"
        data-count="150"
        data-zIndex="-1">
    </script>
</body>
</html>
看板娘
个人是在 header.html 中加入的:
<!DOCTYPE html>
<html lang="zh">
<head>
  <meta charset="UTF-8">
  <meta name="viewport" content="width=device-width, initial-scale=1.0">
  <title>Sakana 小组件集成</title>
  <style>
    /* 固定 Sakana 小组件在页面左下角 */
    #sakana-widget-container {
      position: fixed;
      bottom: 10px;
      left: 10px;
      width: 268px;
      height: 268px;
    }
    #sakana-widget {
      width: 100%;
      height: 100%;
    }
  </style>
</head>
<body>
  <div id="sakana-widget-container">
    <div id="sakana-widget"></div>
  </div>

  <script>
    function initSakanaWidget() {
      new SakanaWidget({
        size: 300,
        autoFit: true,
        character: 'chisato',
        controls: true,
        rod: true,
        draggable: true,
        stroke: { color: '#b4b4b4', width: 10 },
        threshold: 0.1,
        rotate: 0,
        title: false
      }).mount('#sakana-widget');

      // 初始化时检测屏幕宽度
      checkScreenWidth();
      window.addEventListener('resize', checkScreenWidth);
    }

    function checkScreenWidth() {
      var screenWidth = window.innerWidth;
      var container = document.getElementById('sakana-widget-container');
      if (screenWidth <= 960) {
        container.style.display = 'none';
      } else {
        container.style.display = 'block';
      }
    }
  </script>

  <!-- 只在库加载完成后初始化 -->
  <script
    async
    onload="initSakanaWidget()"
    src="https://cdn.jsdelivr.net/npm/sakana-widget@2.2.2/lib/sakana.min.js">
  </script>
</body>
</html>
标题样式
更改特点
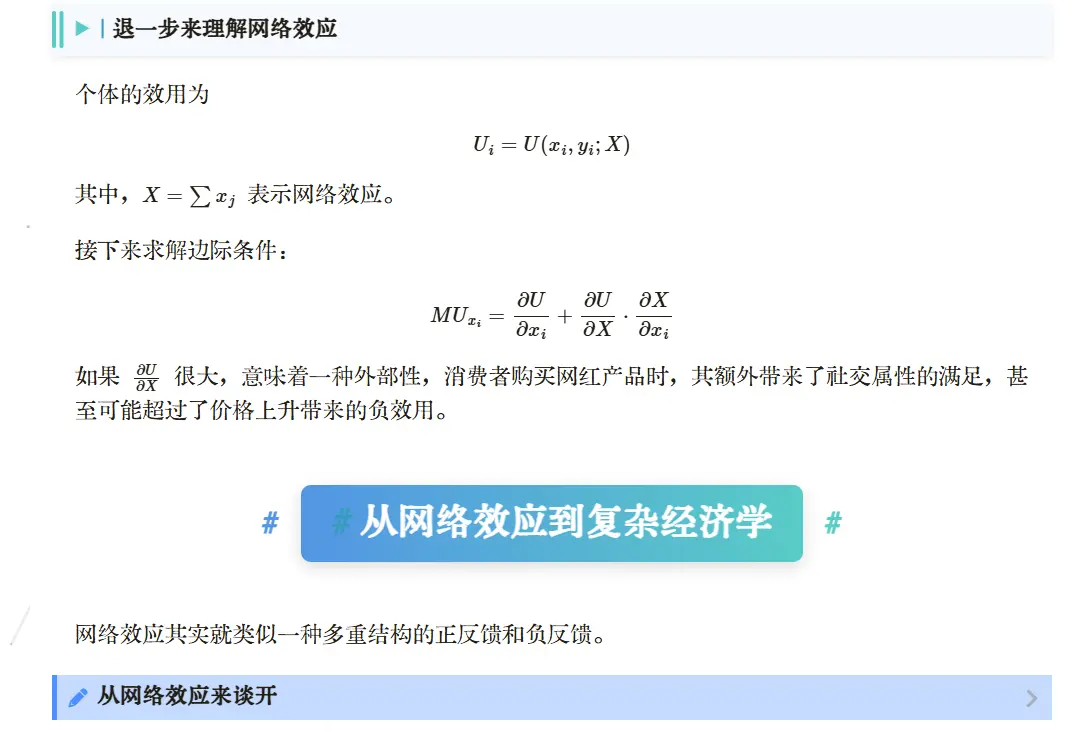
个人更改的标题样式:
- 二级到六级标题:
- 字体从 30 号逐级变小。
- 增强互动性——点击悬浮放大。
- 保持独立单行。
- 二级标题:阴影效果、渐变蓝色方框 +
#包围,居中对齐 - 三级标题到六级标题:
- 级别越低,竖线越多。例如图中的四级标题(
#### h4)左侧有两条竖线。三级标题则只有一条。 - 标题使用透明方框包围,阴影效果。
- 兼容白天夜晚模式切换。
- 级别越低,竖线越多。例如图中的四级标题(
- 四级标题到六级标题:加入等边三角形作为装饰。
效果图片如下
更改方式
在 <自己的博客>\assets\css\_custom.scss 中,添加如下命令:
以前自定义过标题样式记得删去。
/* 标题 **************************/

/* ====================================================================== */
/* H2 二级标题:居中 + 渐变 + 左右 # 装饰 */
/* ====================================================================== */
.page.single h2 {
    position: relative !important;
    display: block !important; /* 确保标题是块级元素,独占一行 */
    width: max-content !important; /* 让宽度自适应内容,才能使用 margin: auto 居中 */
    margin: 2.5rem auto !important; /* 块级元素居中 */
    font-weight: bold !important;
    font-size: 30px !important;
    line-height: 1.4 !important;
    color: #fff !important;
    background: linear-gradient(90deg, #4a90e2, #50c9c3) !important;
    border-radius: 8px !important;
    padding: 10px 24px !important;
    text-align: center !important;
    /* --- Enhanced Shadow --- */
    box-shadow: 0 4px 12px rgba(0, 0, 0, 0.15) !important;
    transition: all 0.3s ease !important; /* Keep transition for smooth hover */
}

/* --- H2 Interactive Hover Effect --- */
.page.single h2:hover {
    box-shadow: 0 8px 20px rgba(0, 0, 0, 0.25) !important; /* Deeper shadow on hover */
    transform: scale(1.02) !important; /* 仅保留放大效果 */
    cursor: pointer !important;
}

/* H2 Dark Mode Shadow */
[data-theme="dark"] .page.single h2 {
    box-shadow: 0 5px 15px rgba(0, 0, 0, 0.3) !important;
}

/* H2 Dark Mode Hover */
[data-theme="dark"] .page.single h2:hover {
    box-shadow: 0 8px 25px rgba(0, 0, 0, 0.6) !important;
}


/* 隐藏主题自动生成的锚点 */
.page.single h2 .headerlink,
.page.single h2 a.headerlink {
    display: none !important;
}

/* H2 左右装饰 # */
.page.single h2::before {
    content: "#" !important;
    position: absolute !important;
    left: -32px !important;
    top: 50% !important;
    transform: translateY(-50%) !important;
    color: #4a90e2 !important;
    font-weight: bold !important;
    font-size: 1.4rem !important;
}

.page.single h2::after {
    content: "#" !important;
    position: absolute !important;
    right: -32px !important;
    top: 50% !important;
    transform: translateY(-50%) !important;
    color: #50c9c3 !important;
    font-weight: bold !important;
    font-size: 1.4rem !important;
}

/* ====================================================================== */
/* H3-H6:左对齐 + 多条竖线分级 + 背景轻色 + 阴影 + 三角符号 */
/* ====================================================================== */

/* 隐藏自带锚点 */
.page.single h3 a.headerlink,
.page.single h4 a.headerlink,
.page.single h5 a.headerlink,
.page.single h6 a.headerlink {
    display: none !important;
}

/* 通用基础样式 */
.page.single h3,
.page.single h4,
.page.single h5,
.page.single h6 {
    position: relative !important;
    display: block !important;
    margin: 20px 0 12px !important;
    line-height: 1.5 !important;
    font-weight: bold !important;
    border-radius: 0 6px 6px 0 !important;
    /* --- Transparent background for light mode --- */
    background: rgba(74, 144, 226, 0.05) !important;
    /* --- Enhanced shadow for light mode --- */
    box-shadow: 0 2px 5px rgba(0, 0, 0, 0.08) !important;
    transition: all 0.3s ease !important; /* Keep transition for smooth hover */
}

/* --- H3-H5 Interactive Hover Effect --- */
.page.single h3:hover,
.page.single h4:hover,
.page.single h5:hover {
    transform: translateX(4px) !important; /* Move slightly to the right */
    background: rgba(74, 144, 226, 0.1) !important; /* Increase opacity */
    box-shadow: 0 4px 10px rgba(0, 0, 0, 0.12) !important; /* Slightly stronger shadow */
    cursor: pointer !important;
}


/* Dark Mode General Styles */
[data-theme="dark"] .page.single h3,
[data-theme="dark"] .page.single h4,
[data-theme="dark"] .page.single h5,
[data-theme="dark"] .page.single h6 {
    /* --- Lighter, transparent background for dark mode --- */
    background: rgba(255, 255, 255, 0.08) !important;
    /* --- Stronger, darker shadow for dark mode --- */
    box-shadow: 0 2px 8px rgba(0, 0, 0, 0.3) !important;
    color: #E5E7EB !important; /* Ensures text is light */
}

/* Dark Mode H3-H5 Hover */
[data-theme="dark"] .page.single h3:hover,
[data-theme="dark"] .page.single h4:hover,
[data-theme="dark"] .page.single h5:hover {
    transform: translateX(4px) !important;
    background: rgba(255, 255, 255, 0.15) !important; /* Increase opacity */
    box-shadow: 0 4px 10px rgba(0, 0, 0, 0.5) !important; /* Stronger shadow */
}


/* H3:1 条竖线 */
.page.single h3 {
    font-size: 22px !important;
    padding: 10px 18px !important;
}
.page.single h3::before {
    content: "" !important;
    position: absolute !important;
    left: 0 !important;
    top: 0 !important;
    bottom: 0 !important;
    width: 5px !important;
    background-color: #4a90e2 !important;
    border-radius: 3px 0 0 3px !important;
}

/* H4:▶ + 2 条竖线 */
.page.single h4 {
    font-size: 18px !important;
    padding: 8px 14px 8px 38px !important; /* Increased left padding for symbol */
}
/* Triangle Symbol */
.page.single h4::before {
    content: "▶" !important;
    position: absolute !important;
    left: 18px !important;
    top: 50% !important;
    transform: translateY(-50%) !important;
    font-size: 12px !important;
    color: #50c9c3 !important;
}
/* Two Vertical Lines (efficiently using box-shadow) */
.page.single h4::after {
    content: "" !important;
    position: absolute !important;
    left: 0 !important;
    top: 15% !important; /* Make lines shorter than heading height */
    bottom: 15% !important;
    width: 3px !important;
    background-color: #50c9c3 !important;
    border-radius: 2px !important;
    box-shadow: 6px 0 0 #50c9c3 !important; /* Creates the second line */
}

/* H5:▶ + 3 条竖线 */
.page.single h5 {
    font-size: 16px !important;
    padding: 6px 14px 6px 42px !important; /* Increased left padding */
}
/* Triangle Symbol */
.page.single h5::before {
    content: "▶" !important;
    position: absolute !important;
    left: 22px !important;
    top: 50% !important;
    transform: translateY(-50%) !important;
    font-size: 10px !important;
    color: #34495e !important;
}
/* Three Vertical Lines (using box-shadow) */
.page.single h5::after {
    content: "" !important;
    position: absolute !important;
    left: 0 !important;
    top: 15% !important;
    bottom: 15% !important;
    width: 2px !important;
    background-color: #34495e !important;
    border-radius: 2px !important;
    box-shadow: 5px 0 0 #34495e, 10px 0 0 #34495e !important; /* Creates 2nd and 3rd lines */
}

/* NEW H6:▶ + 1 条虚线 */
.page.single h6 {
    font-size: 15px !important;
    padding: 5px 12px 5px 30px !important;
    background: none !important; /* Simpler style for H6 */
    box-shadow: none !important;
    border-radius: 0 !important;
    border-bottom: 1px solid #eee !important;
}
[data-theme="dark"] .page.single h6 {
    border-bottom: 1px solid #444 !important;
}
/* Triangle Symbol */
.page.single h6::before {
    content: "▶" !important;
    position: absolute !important;
    left: 8px !important;
    top: 50% !important;
    transform: translateY(-50%) !important;
    font-size: 10px !important;
    color: #777 !important;
}
[data-theme="dark"] .page.single h6::before {
    color: #888 !important;
}

/* --- H6 Interactive Hover Effect --- */
.page.single h6:hover {
    transform: translateX(2px) !important; /* Smallest shift */
    color: #4a90e2 !important; /* Highlight text color */
    cursor: pointer !important;
}
[data-theme="dark"] .page.single h6:hover {
    color: #50c9c3 !important;
}
在博客中渲染数学公式
虽然 LoveIt 主题通过 KaTeX 提供数学公式的支持,但个人觉得使用体验不如 MathJax 。
使用 MathJax 的方法首先是在 <你的博客>\layouts\partials 中创建 mathjax.html。
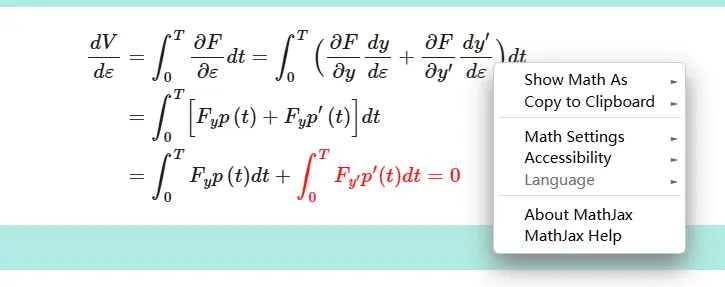
mathjax.html: 右键点击网站公式支持公式代码复制。
{{ if .Params.math }}
<script>
  MathJax = {
    tex: {
      inlineMath: [["$", "$"]],
    },
    displayMath: [
      ["$$", "$$"],
      ["\[\[", "\]\]"],
    ],
    svg: {
      fontCache: "global",
    },
  };
</script>
<script src="https://polyfill.io/v3/polyfill.min.js?features=es6"></script>
<script
  id="MathJax-script"
  async
  src="https://cdn.jsdelivr.net/npm/mathjax@3/es5/tex-mml-chtml.js"
></script>
{{ end }}
然后在 <你的博客>\layouts\partials\header.html 中添加调用命令即可。
{{ partial "mathjax.html" . }}在每篇文章中,想要启用数学公式渲染,就在开头使用:
Math = true由于 Hugo 在渲染 Markdown 文档时会根据 _/*/>> 之类的语法生成 HTML 文档, 并且有些转义字符形式的文本内容 (如 \(/\)/\[/\]/\\) 会自动进行转义处理, 因此需要对这些地方进行额外的转义字符表达来实现自动渲染:
_->\_*->\*>>->\>>\(->\\(\)->\\)\[->\\[\]->\\]\\->\\\\
例如我渲染以下公式:
\[
V(\varepsilon)=\int_{0}^{T}F[t,\underbrace{y^{*}\left(t\right)+\varepsilon p\left(t\right)}_{y(t)},\underbrace{y^{*}\left(t\right)+\varepsilon p^{\prime}\left(t\right)}_{y^{’}\left(t\right)}]dt
\]
实际情况会变成:
[ V (\varepsilon)=\int_{0}^{T}F[t,\underbrace{y^{}\left (t\right)+\varepsilon p\left (t\right)}_{y (t)},\underbrace{y^{}\left (t\right)+\varepsilon p^{\prime}\left (t\right)}_{y^{’}\left (t\right)}]dt ]
只有转化为 \_ ^\* \\[ \\] 才是正确的:
\\[
V(\varepsilon)=\int\_{0}^{T}F[t,\underbrace{y^{\*}\left(t\right)+\varepsilon p\left(t\right)}\_{y(t)},\underbrace{y^{\*}\left(t\right)+\varepsilon p^{\prime}\left(t\right)}\_{y^{'}\left(t\right)}]dt
\\]
\[ V (\varepsilon)=\int_{0}^{T}F[t,\underbrace{y^{*}\left (t\right)+\varepsilon p\left (t\right)}_{y (t)},\underbrace{y^{*}\left (t\right)+\varepsilon p^{\prime}\left (t\right)}_{y^{’}\left (t\right)}]dt \]
但就我个人使用体验而言,有时候只转化式子的一半命令也可以渲染——转化多少命令似乎与渲染复杂度相关。
例如我渲染 $2\_i^\*-2_j^*$ —— $2_i^*-2_j^*$, 由于式子很简单,转不转化命令都一样。